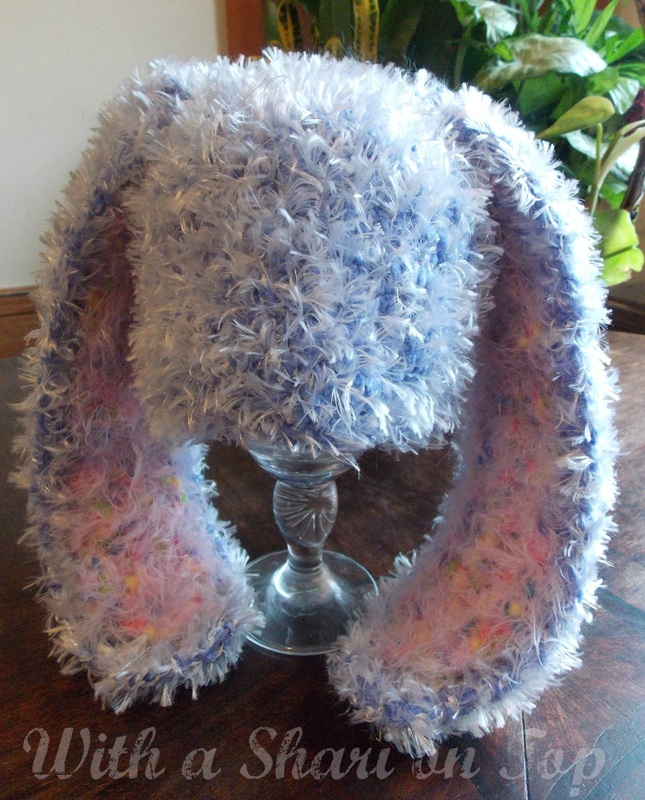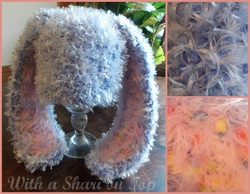
I recently purchased a large lot of fun yarns from a local estate sale. I was lucky enough to score a few skeins of Patons Twister yarn in Blueberry. As soon as I looked at the skeins I was instantly reminded of one cuddly, fluffy, and very popular animal friend... a bunny of course! This project worked up super fast and I must admit it's pretty easy on the eyes. Enjoy this fun twist on the ever so popular bunny hat.
I didn't write an exact pattern while I was creating this hat, but I can hopefully give you enough directions for crocheting your very own using any type of bulky yarn.
Since Patons Twister yarn is quite bulky with the fuzz, I used a size J hook for this project. I used a super soft pink yarn with lots of color pieces in it for the insides of the ears, I purchased this yarn at the same estate sale but it unfortunately did not have a label and I am unsure of it's brand or exact color. You can use any color you'd like in worsted weight for the center of the ear.
Before you start you need to decide which size you'd like your hat to be. I chose to make a 0-3 month bunny hat. I always refer to this website **HERE** for measurements according to age. I made sure my 0-3 month hat had a 12.5" circumference, and was approximately 6" long. I always work bulky hats in a continuous round and do not slip stitch at the end of each round. I used HDC for this project, but you can use a single crochet if you'd like. You can use a stitch marker to mark the beginning of each row just in case you lose count.
**Materials needed**
Three skeins of Patons Twister yarn, or at least 150 yards of bvlky yarn of your choice
30 yards of worsted weight yarn in color of your choice for inner ear
Size J hook
Measuring tape for measuring circumference and length
Stitch Markers (optional)
Start by chaining two.
Row 1: HDC 9 times in the second chain from your hook. (9)
Row 2: 2 HDC in each stitch around (18)
Row 3: 1 HDC in first stitch, 2 HDC in next, repeat around (27)
Row 4: 1 HDC in two stitches, 2 HDC in next, repeat around (36)
Repeat this process until you have reached your desired circumference.
(HDC in three stitches, 2 HDC in next (45)
(HDC in four stitches, 2 HDC in next (54)
(HDC in five stitches, 2 HDC in next (63)
etc.
Once you've reached your desired circumference, you simply HDC in each stitch around until you've also reached your desired length, and finish off. Easy Peasy!
Outer Ear (Make 2)
Start by chaining 11
Row 1: HDC in second chain from hook and in each stitch across, ch 1 (10)
Row 2: Turn, HDC in each stitch across, ch 1 (10)
Row 3-12: Repeat Row 2, you can make your ears shorter by using less rows or longer by crocheting more than what I have suggested here.
Row 13: HDC dec over the first two stitches, HDC across until the second to last stitch, HDC dec over the last two stitches, ch 1 (8)
Row 14: Turn, HDC dec over the first two stitches, HDC across until the second to last stitch, HDC dec over the last two stitches, finish off (6)
Inner Ear (Make 2)
Start by chaining 9
Row 1: HDC in second chain from hook and in each stitch across, ch 1 (8)
Row 2: Turn, HDC in second chain from hook and in each stitch across, ch 1 (8)
Row 3-9: Repeat row 2, you can make your inner ears shorter by crocheting all of the rows I have suggested here, or you can make them longer by crocheting more rows than suggested here.
Row 10: Turn, HDC dec over the first two stitches, HDC across until the second to last stitch, HDC dec over the last two stitches, ch1
Row 11: Turn, HDC dec over the first two stitches, HDC across until the second to last stitch, HDC dec over the last two stiches, finish off.
Sew the inner ear pieces to the outer ear pieces, sew in all ends on ears and then sew your ears onto your hat. Make sure you sew in all the ends on your hat.
There you have it! I realize this could be more detailed, but bare with me as I really dive into this new blogging thing and make each entry even better.
Thank you for giving this pattern a chance, I'd love to see your finished projects!
I appreciate you and your support! <3 <3
 RSS Feed